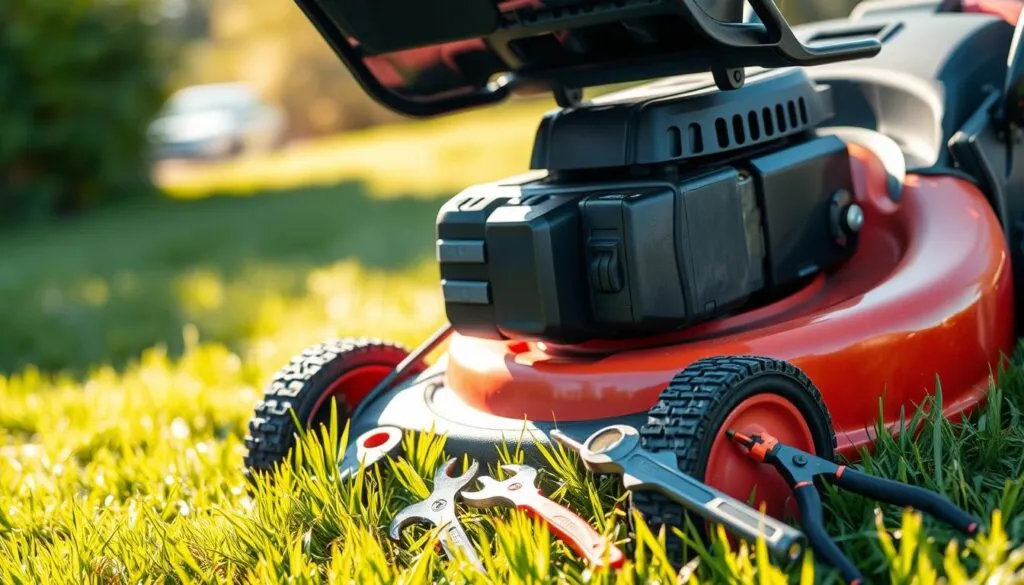
That frustrating moment when you pull the cord and nothing happens is all too familiar for many homeowners. Your lawn maintenance plans come to a sudden halt, leaving you staring at a silent machine. This common equipment issue can test anyone’s patience.
Understanding what prevents your equipment from starting is the first step toward a quick solution. Most beginning problems stem from simple, fixable issues rather than major mechanical failures. You don’t need to be a professional mechanic to diagnose many common starting difficulties.
This comprehensive troubleshooting guide will walk you through a systematic diagnostic process. We’ll help you identify the underlying causes of your equipment’s refusal to start. You’ll learn effective solutions for getting back to your lawn care tasks efficiently.
By following our step-by-step approach, you’ll gain the confidence to handle most starting challenges yourself. You’ll also learn when it’s time to seek professional assistance for more complex mechanical issues.
Key Takeaways
- Most starting difficulties result from simple, fixable problems
- A systematic approach helps identify the root cause quickly
- Basic troubleshooting can save time and money on repairs
- Understanding common issues builds confidence in equipment maintenance
- Proper diagnosis determines whether DIY fixes are appropriate
- Regular maintenance prevents many starting problems before they occur
- Knowing when to seek professional help is equally important
Identifying Common Lawn Mower Problems
When your equipment remains silent after pulling the starter cord, several common culprits could be responsible. Recognizing these patterns helps you diagnose issues efficiently.
Fuel-related difficulties rank among the top reasons for starting failure. Empty tanks or degraded gasoline create immediate combustion problems. Old gas breaks down and clogs the entire fuel system.
Signs of a Failing Engine and Wear
Engine wear reveals itself through specific symptoms. Unusual noises during starting attempts signal internal component deterioration. Excessive vibration or visible oil leaks indicate serious mechanical issues.
One experienced mechanic noted:
“The majority of engine failures begin with subtle symptoms that most owners overlook until it’s too late.”
Effects of Old Fuel, Clogged Filters, and Debris
Clogged filters create immediate airflow and fuel delivery problems. A blocked air filter restricts oxygen to the combustion chamber. Meanwhile, dirty fuel filters prevent proper gas flow to the engine.
Debris accumulation presents another frequent challenge. Grass clippings and mud under the deck can immobilize the cutting blade. This resistance prevents the engine from turning over properly.
| Problem Type | Primary Symptoms | Quick Check |
|---|---|---|
| Fuel Issues | No combustion, stale smell | Check fuel age and tank level |
| Filter Problems | Rough operation, black smoke | Visual inspection for dirt |
| Debris Buildup | Blade resistance, dragging | Clear under-deck area |
Battery and carburetor issues complete the list of common reasons for failure. Corroded terminals or gummed-up carburetors from old gas frequently cause starting problems. Safety switch malfunctions often go unnoticed despite being simple fixes.
Understanding “why won’t my mower turn over”
When your machine fails to respond to starting attempts, the problem lies in the initial rotation process. The phrase “won’t turn over” specifically means the engine doesn’t crank or rotate when you activate the starting system. This differs from an engine that cranks but refuses to start running.
Clarifying the Starter System
The starting mechanism consists of several components working together. These include the battery, ignition switch, starter solenoid, and starter motor. Each part plays a critical role in initiating engine rotation.
Different sounds during starting attempts reveal specific issues. Complete silence often indicates electrical problems or safety switch failures. A clicking sound typically points to solenoid issues or weak battery power. Grinding noises suggest mechanical engagement problems.

For pull-start models, common problems include jammed mechanisms or broken recoil springs. A seized engine can also prevent the cord from engaging the flywheel properly. The starter mechanism must freely rotate to begin the combustion cycle.
Electric-start systems face different challenges. Insufficient battery power frequently causes starting failure. Faulty solenoids or worn starter motors can prevent engine rotation even when you turn the key. Proper electrical connections are essential for successful starting.
The starter engages the flywheel to create initial engine rotation. This process must occur before combustion can begin. When this engagement fails, your equipment remains silent and unresponsive.
Troubleshooting Fuel, Air, and Carburetor Issues
The combustion process requires a precise balance of fuel, air, and proper carburetor function. When any component fails, starting becomes impossible. Begin your diagnosis with these essential systems.
Examining Fuel Quality and Checking the Fuel Tank
Start by verifying adequate gas levels in your fuel tank. Check that the fuel shutoff valve remains open if your equipment has one. Old gasoline causes most fuel-related problems.
Ethanol-based fuel deteriorates within 30 days, forming varnish that clogs the entire system. Drain contaminated gas responsibly and refill with fresh fuel. Don’t forget to clear the fuel cap vent to prevent vacuum lock.
| Fuel Issue | Identification Method | Recommended Action |
|---|---|---|
| Stale Gasoline | Dark color, sour smell | Drain tank completely |
| Clogged Fuel Filter | Restricted fuel flow | Replace filter element |
| Vacuum Lock | No fuel delivery | Clear cap vent |
Cleaning the Air Filter and Carburetor
Locate the air filter housing and remove the filter for inspection. Foam filters need washing with mild detergent, complete drying, and light oiling. Replace paper filters showing excessive dirt.
For carburetor maintenance, turn off the fuel valve before removal. Disassemble carefully and spray all components with carburetor cleaner. Ensure all jets and passages are completely clear.
Regular maintenance of fuel and air systems prevents 80% of common starting issues.
A clogged fuel filter restricts flow to the carburetor, while dirty air filters disrupt the air-fuel mixture. Keep both systems clean for reliable operation.
Checking the Ignition System and Electrical Connections
Proper spark generation is essential for initiating the combustion cycle in your equipment. The ignition system creates the electrical charge needed to ignite the fuel-air mixture. Without reliable electrical connections, starting becomes impossible.
Inspecting the Spark Plug and Battery Health
Begin by carefully removing the spark plug wire. Use a socket wrench to unscrew the plug for examination. A healthy plug shows a light tan or gray electrode.
Carbon buildup or oil deposits indicate replacement is necessary. Test the spark by grounding the plug against the engine block while cranking. Look for a strong blue spark indicating proper ignition function.
For electric-start models, check battery health with a multimeter. A fully charged 12-volt battery should read between 12.4 and 12.7 volts. Clean terminals with baking soda and water mixture to remove corrosion.

Verifying Electrical Wiring and Starter Functionality
Inspect all wiring for damage or loose connections. Corroded terminals disrupt electrical flow to the starter motor. Check that the coil-to-flywheel gap measures exactly .020 inches.
If there’s no spark at the plug, disconnect the shut-off wire at the control bracket. Test again. If still no spark, disconnect at the coil. This isolates whether the issue is a failed ignition module or safety interlock.
| Component | Healthy Condition | Problem Signs |
|---|---|---|
| Spark Plug | Light tan electrode, clean gap | Carbon fouling, oil deposits |
| Battery | 12.4-12.7 volts, clean terminals | Low voltage, corrosion buildup |
| Ignition Coil | .020 inch gap, strong spark | No spark, incorrect spacing |
Proper electrical system maintenance ensures reliable engine starting. Regular inspection prevents most ignition-related starting difficulties.
Reviewing Safety Features and Interlocks
Modern lawn equipment incorporates multiple safety mechanisms designed to prevent accidental operation. These critical safety features ensure specific conditions are met before the engine can start running. Understanding how these systems work helps you diagnose starting problems effectively.
Your equipment’s safety switches create essential protection layers. The seat switch prevents operation when you’re not properly seated. The blade engagement switch ensures cutting blades are disengaged during starting attempts.
Ensuring Blade and Seat Safety Switches Are Engaged
Check each switch for proper physical condition and engagement. Look for damaged cables or stuck mechanisms that prevent correct operation. The handlebar brake switch requires full depression before starting.
Sometimes the engine will crank but refuse to fire. This often indicates a faulty safety interlock is preventing ignition. Worn seat cushions can prevent proper switch activation even when you’re seated.
Testing the Flywheel and Safety Interlock System
To isolate problematic switches, carefully disconnect them one at a time. Bridge the wires temporarily—if you get spark, you’ve identified the faulty component. Reconnect switches individually to pinpoint the specific failure.
Inspect the flywheel if the blade recently hit a hard object. A sheared flywheel key disrupts engine timing and prevents starting. This safety feature protects the engine from serious damage.
| Safety Switch Type | Function | Testing Method |
|---|---|---|
| Seat Switch | Requires operator presence | Check seat pressure activation |
| Blade Engagement | Prevents blade operation during start | Verify disengaged position |
| Brake/Clutch | Ensures brake application | Test pedal depression |
| Handlebar Safety | Dead man’s control feature | Check bar return mechanism |
Never operate your equipment with disabled safety features. These systems prevent serious injuries and are required for safe lawn maintenance. Properly functioning safety switches ensure both operator protection and reliable starting.
DIY Maintenance and Long-Lasting Performance Tips
The difference between a stubborn machine and a dependable performer often comes down to simple preventative care. Establishing regular maintenance routines ensures your equipment starts reliably season after season. Proper upkeep extends the operational life of your lawn equipment significantly.
Regular Cleaning and Component Replacements
Fuel quality directly impacts starting reliability. Always use fresh, high-quality gasoline and consider fuel stabilizers during storage periods. Ethanol-free fuel has longer shelf life and causes fewer carburetor problems.
Inspect your air filter every 25 hours of operation or seasonally. Clean foam filters with mild detergent and replace paper filters when necessary. Proper airflow ensures optimal engine performance.
Check oil levels before each use and change oil every 50 hours or annually. Clean oil promotes easier starting and protects internal components. Use manufacturer-recommended viscosity for your climate.
Replace spark plugs every 100 hours or seasonally. Keep a spare plug on hand and verify proper gap specifications. A quality spark plug ensures consistent ignition.
Preventative Maintenance to Avoid Starting Issues
For electric-start models, maintain battery charge during off-season storage. Use battery tenders and clean terminals regularly to prevent corrosion. Proper care extends battery life to 3-5 years.
Remove debris accumulation from the mower deck and engine housing using compressed air. Regular cleaning prevents buildup that affects performance and starting reliability.
Inspect drive belts and pulleys for wear. Listen for squealing sounds during operation that indicate needed replacement. Address issues before complete failure occurs.
If possible, run your equipment monthly during off-season for 10-15 minutes. This prevents fuel system issues and keeps components in good working condition.
Always consult your owner’s manual for manufacturer-specific maintenance schedules. Following recommended practices ensures optimal performance for your particular model.
Conclusion
Mastering basic troubleshooting transforms a non-starting lawn mower from a major headache into a manageable task. This guide has equipped you with a logical process to identify common starting problems.
You now understand how to systematically check fuel quality, air filters, spark plugs, and safety switches. Most equipment issues stem from these simple, fixable areas rather than complex mechanical failures.
This knowledge builds confidence for independent diagnosis and repair. Investing time in regular upkeep, like using fresh fuel and seasonal preparation, minimizes future problems.
Proactive maintenance ensures reliable performance and extends your equipment’s lifespan. If your lawn mower still refuses to start after thorough checks, seeking professional help for internal engine issues is the wise next step.
Apply these insights to spend less time on repairs and more time enjoying your well-kept lawn.
FAQ
What does it mean when a lawn mower engine won’t turn over?
When your mower won’t turn over, it means the engine isn’t cranking when you turn the key or pull the starter rope. This is often an electrical issue, such as a dead battery, faulty starter motor, or a problem with safety switches preventing the ignition circuit from completing.
How can old fuel prevent my mower from starting?
Gasoline degrades over time, losing its combustibility and leaving behind sticky residues. This old fuel can clog the carburetor jets and fuel filter, starving the engine. Using fresh gas is one of the simplest fixes for many starting problems.
Which safety features could stop my mower from turning over?
Modern mowers have several safety interlocks. Common ones include the blade engagement switch, the brake safety switch, and the seat switch. If any of these are not properly engaged or are faulty, they will interrupt the starting sequence to prevent accidents.
How do I check the spark plug for issues?
First, disconnect the spark plug wire for safety. Then, remove the plug and inspect it. Look for heavy carbon buildup, cracks, or a worn electrode. You can also check for spark by grounding the plug against the engine block and pulling the starter cord to see a blue spark.
What maintenance can I do to avoid future starting issues?
Regular upkeep is key. This includes changing the air filter, using a fuel stabilizer if storing the mower, checking the oil level before each use, and keeping the underside of the deck clean of grass clippings and debris. Consult your owner’s manual for a specific maintenance schedule.