What if your lawn’s health depends more on blade maintenance than your watering schedule? Many homeowners overlook this critical connection between sharp cutting edges and vibrant turf.
A dull blade doesn’t just cut poorly—it tears grass blades instead of slicing them cleanly. This damage creates open wounds that invite disease and stress your entire lawn. Your mower also works harder with dull equipment, reducing its lifespan.
Regular blade care transforms your mowing results. Sharp edges create that professional striped appearance everyone admires. They also ensure even cutting across your entire yard.
This guide reveals the optimal maintenance schedule for your equipment. You’ll learn to recognize when your cutting tools need attention. Discover how to extend your mower’s life while achieving superior lawn health.
Key Takeaways
- Sharp blades create clean cuts that promote lawn health and prevent disease
- Dull cutting edges tear grass instead of slicing, causing stress and brown tips
- Proper blade maintenance extends your mower’s lifespan and improves performance
- Regular care ensures even cutting and that professional striped appearance
- Recognizing when blades need attention saves time and money on repairs
- Optimal maintenance schedules vary based on usage patterns and lawn conditions
- Clean cuts reduce water loss and help your turf recover faster after mowing
Introduction to Mower Blade Sharpening
Sharp cutting equipment serves as the foundation for both lawn vitality and equipment longevity. The Virginia Cooperative Extension emphasizes this connection, stating:
“The quickest way to improve lawn quality is to mow with a sharp blade.”
Understanding the Importance of a Sharp Blade
Your mower’s cutting performance directly influences turf recovery. Sharp blades create clean cuts that heal rapidly. Dull equipment tears grass tissue instead of slicing cleanly.
This tearing action causes brown edges and ragged appearances. Torn grass becomes vulnerable to disease and fungal infections. Proper blade maintenance prevents these issues before they start.
Impact on Lawn Health and Mower Efficiency
Your equipment operates more efficiently with well-maintained cutting edges. The machine experiences less strain and vibration. This reduces wear on engine components over time.
A healthy lawn requires fewer chemical treatments when blades cut properly. Clean cuts minimize stress on grass plants. Your turf maintains its vibrant green color throughout the growing season.
Regular blade care represents a simple investment with significant returns. You’ll notice improved fuel efficiency and reduced maintenance costs. Your equipment lasts longer while delivering professional results.
Signs Your Mower Blades Need Sharpening
The quality of your cut reveals more about blade condition than any maintenance schedule could indicate. Your lawn provides clear visual cues when cutting edges lose their sharpness.

Uneven Cuts and Ragged Grass Edges
Examine your lawn immediately after mowing. Look closely at the grass blade tips. Sharp equipment creates clean, straight cuts.
Dull blades tear grass instead of slicing. This causes ragged edges and uneven height. You might notice uncut strips or require multiple passes.
Within days, torn grass tips turn brown. This stress response signals blade problems. A healthy lawn shows uniform green coloration after cutting.
Dents, Nicks, and Tearing of Grass
Regular blade inspection catches damage early. Check for dents, nicks, or chips along the cutting edge. These imperfections prevent clean cuts.
Physical damage accumulates from rocks and debris. Even small imperfections affect performance. Your mower works harder with compromised blades.
Torn grass has a whitish appearance right after mowing. This differs from the clean green look of proper cuts. Consistent tearing means immediate attention is needed.
Essential Safety Precautions for Blade Sharpening
Before touching any cutting equipment, establishing proper safety protocols prevents serious injuries and ensures successful maintenance. Your personal protection should always come first when working with sharp tools.
Disconnecting Power Sources and Wearing Protective Gear
Always disconnect all power sources before beginning work. For gas-powered equipment, remove the spark plug wire completely. This prevents accidental engine starts during maintenance.
Electric models require unplugging from outlets or battery removal. Drain the fuel tank to avoid dangerous spills. Wear thick work gloves and safety glasses for protection.
Your eyewear shields against metal particles. Heavy-duty gloves prevent cuts from sharp edges. These simple steps create a safe working environment.
Securing the Blade During Sharpening
Proper blade securing prevents movement during sharpening. Use a sturdy vise to hold the cutting tool firmly in place. This stability reduces injury risks significantly.
Always grip the blade by its center mounting area. Never touch the sharp cutting edges directly. Secure positioning allows for controlled, precise work.
Choose a well-ventilated workspace away from flames. Stable equipment handling ensures consistent results. These precautions make the process efficient and safe.
Tools and Preparation for Sharpening Mower Blades
Your choice between manual and powered sharpening methods depends on your experience and available tools. Proper preparation ensures safety and optimal results.

Hand Tools vs. Machine Options
You have two main approaches for blade maintenance. Manual methods use a metal file for precise control. This hand technique works well for occasional sharpening.
Powered options include bench grinders and angle grinders. These machines speed up the process significantly. Choose based on your comfort level and frequency of use.
Cleaning and Marking the Blade for Proper Reinstallation
Before any sharpening begins, clean the cutting surface thoroughly. Use a wire brush to remove grass buildup and debris. This reveals the true condition of your mower blade.
Mark the bottom side with a permanent marker before removal. This simple step ensures correct reinstallation. The cutting edge must face downward for proper operation.
Gather all necessary equipment before starting. A sturdy vise secures the blade during work. Protective gear keeps you safe throughout the process.
How to Remove and Clean Your Mower Blade
Accessing the cutting edge requires careful preparation to ensure both safety and ease of reinstallation. This process protects you and your equipment, setting the stage for effective maintenance.
Step-by-Step Instructions for Blade Removal
Begin by putting on thick work gloves and safety glasses. Disconnect the spark plug wire on gas models or remove the battery from electric ones. This prevents accidental starting.
Position your equipment correctly. Tilt gas-powered machines on their side, ensuring the air filter and carburetor face upward. This prevents fluid leaks. Simply turn electric push mowers upside down for access.
Locate the central bolt securing the blade. Use a socket wrench with the correct size to loosen it by turning counterclockwise. If the bolt is stuck, apply penetrating oil and wait before trying again.
Preparing the Blade for Sharpening
Once the blade is free, note the order of any washers or spacers on the bolt. You must reinstall these components exactly as found. Mark the blade’s underside with a permanent marker before removal. This guarantees correct orientation later.
Cleaning is the final preparation step. Use a stiff wire brush to scrub away caked-on grass, dirt, and rust. For stubborn grime, a brief application of a lubricant like WD-40 can help loosen the buildup.
| Mower Type | Correct Position | Key Precaution |
|---|---|---|
| Gas-Powered | Tilt on its side | Air filter & carburetor must face up |
| Electric Push | Turn upside down | Ensure battery is disconnected |
| Riding Mower | Raise and secure deck | Disconnect spark plug, block wheels |
How Often Should I Sharpen Mower Blades?
Tracking usage hours provides the most accurate method for determining sharpening intervals. Most homeowners find that maintaining cutting edges every 20-25 hours of operation keeps their equipment performing optimally. This typically translates to two or three maintenance sessions per year for average residential use.
Usage Hours and Seasonal Recommendations
Calculate your personal schedule by multiplying your typical mowing session duration by weekly frequency. For example, thirty-minute sessions twice weekly accumulate one hour of use. You’ll reach the 25-hour threshold after approximately six months.
Spring and early summer demand more frequent attention due to vigorous grass growth. During these peak seasons, your equipment works harder and accumulates wear faster. Consider increasing maintenance frequency during these active periods.
Immediate sharpening becomes necessary after impacting rocks, roots, or other hard objects. These incidents create nicks that compromise cutting performance regardless of your regular schedule. Professional landscapers maintain blades more frequently—often every 8-12 hours—to ensure consistent quality.
Challenging conditions accelerate edge wear. Sandy soil, overgrown yards, and debris-heavy properties require more frequent maintenance. Keeping spare cutting tools on hand simplifies rotation and ensures you always have sharp equipment available.
Sharpening Techniques: By Hand and with Machines
With your blade securely mounted, you are ready to transform its dull edge into a clean-cutting surface. The method you choose—manual or powered—depends on your tools and comfort level. Both approaches can yield excellent results when performed correctly.
Manual Sharpening Using Files and Abrasives
The traditional hand method offers precise control. Use a 10-inch metal file for this process. Maintain the factory angle, typically between 30 and 45 degrees.
Push the file in one direction along the cutting edge. Avoid a back-and-forth sawing motion. Apply steady pressure until you feel the file teeth biting into the metal.
Work from the blade tip toward the center. Most blades require fewer than 50 strokes per side. Aim for a sharpness similar to a butter knife, not a razor.
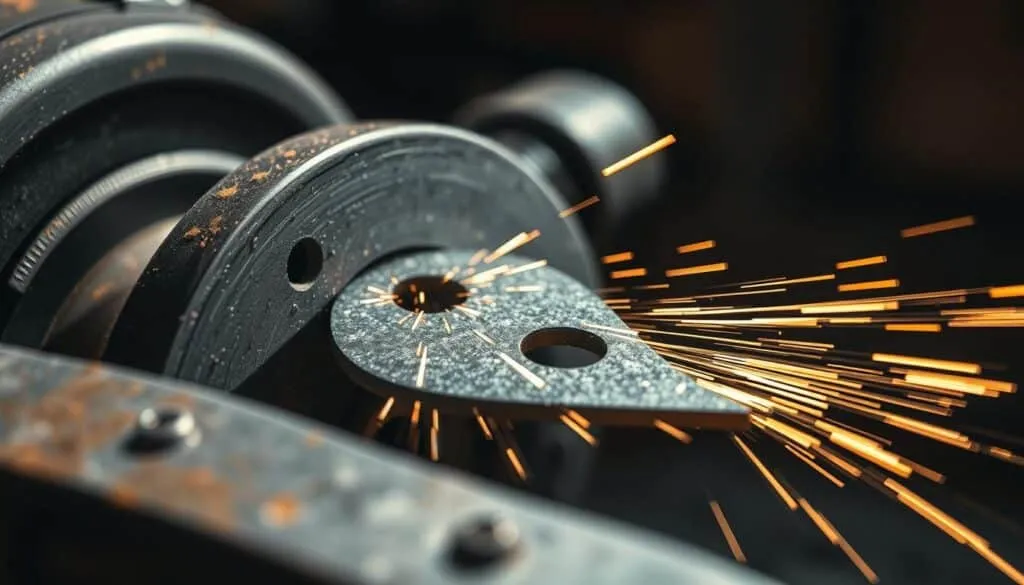
Using Drill-Powered and Angle Grinder Methods
Powered tools accelerate the sharpening process. A drill attachment with a grinding stone often includes a guide. This automatically sets the correct angle as you move it along the edge.
An angle grinder with a flap disc is another efficient option. Move the tool slowly in smooth passes. Follow the existing angle of the cutting edge to even out imperfections.
Check your progress frequently with powered methods. Prevent overheating by touching the metal. If it becomes too hot, cool it with water before continuing.
Checking Blade Balance and Post-Sharpening Maintenance
Achieving perfect balance represents the final critical step before returning your cutting tool to service. An unbalanced cutting edge creates excessive vibration that damages equipment components over time.
Proper equilibrium ensures smooth operation and protects your investment. This phase completes your maintenance routine effectively.
Balancing Techniques to Reduce Vibration
Test balance using simple household tools. Insert a screwdriver through the center hole and hold the blade horizontally. Release it gently to observe movement.
A level position indicates proper balance. If one side drops, that edge carries extra weight. Remove small amounts of metal from the heavier end until equilibrium is achieved.
| Method | Tools Required | Precision Level |
|---|---|---|
| Screwdriver Test | Standard screwdriver | Basic balance check |
| Commercial Balancer | Cone-shaped balancer tool | High precision |
| Visual Inspection | None required | Rough estimate only |
Final Steps: Reinstallation and Ongoing Maintenance
Clean the mounting area thoroughly before reinstalling the cutting tool. Remove grass buildup and debris that could interfere with rotation.
Verify orientation using your pre-removal mark. The marked side must face downward toward the grass. Secure the bolt firmly with your socket wrench.
Reconnect power sources and test operation. Listen for unusual sounds and watch for vibration. Regular visual inspections extend time between major maintenance sessions.
Check blade tightness periodically throughout the season. Consistent care prevents problems before they develop. Your equipment will reward you with reliable performance.
Conclusion
The difference between an average lawn and an exceptional one often comes down to one simple maintenance habit. Your commitment to sharp cutting edges transforms ordinary turf care into professional-level results.
Regular attention to your equipment’s cutting performance pays dividends throughout the season. Clean slices promote rapid grass recovery while preventing disease entry points. This practice extends your machine’s lifespan and reduces repair expenses.
Whether you choose manual filing or powered methods, consistent care ensures optimal performance. The time invested in learning proper techniques returns substantial benefits in lawn health and equipment efficiency.
Your dedication to this essential aspect of turf management demonstrates responsible ownership. The rewards include vibrant grass, efficient operation, and reliable equipment that serves you well for years.
FAQ
What are the telltale signs that my lawn mower blades need sharpening?
You’ll notice your lawn looks ragged and uneven after cutting. The grass tips may appear torn or brown instead of cleanly sliced. Your machine might also struggle more, consuming extra fuel and vibrating excessively.
Is it safe for me to sharpen the cutting edge myself?
A> Yes, with proper safety steps. Always disconnect the spark plug wire to prevent accidental starts. Wear heavy-duty gloves and safety glasses. Securely clamp the blade in a vise before you begin the sharpening process to protect your hands.
What tools do I need for this lawn care maintenance task?
A> For manual sharpening, a mill bastard file is a common hand tool. For faster results, a bench grinder or an angle grinder with a flap disc works well. You’ll also need a socket wrench to remove the blade and a blade balancer to check it afterward.
How does a dull blade affect my lawn’s health?
A> Dull blades tear the grass, creating open wounds. This stresses the turf, making it more susceptible to disease and causing those unsightly brown tips. A clean cut from a sharp edge promotes healthier, greener growth.
What is the correct procedure for removing the blade?
A> First, disconnect the spark plug for safety. Tip the mower on its side with the air filter and carburetor facing up. Use a block of wood to wedge the blade and prevent it from spinning, then use a socket wrench to loosen the mounting bolt.
Why is balancing the blade so important after sharpening?
A> An unbalanced blade causes significant vibration, which can damage your mower’s spindle and engine over time. It’s a critical step for smooth operation and long-term equipment care. A simple balancer tool makes this check easy.