Have you ever stared at your sputtering machine, wondering which tiny part holds the key to getting it running smoothly again? That small, vital component is often the carburetor, and knowing its exact position is the first step to solving many common engine problems.
This essential part mixes air and fuel for proper combustion. On most walk-behind models, you’ll find this metal piece on the side or top of the engine. It’s typically situated just behind the air filter housing.
Locating this part yourself can save you significant time and money. Instead of an immediate service call, a quick visual check can empower you. You gain the confidence to perform basic maintenance and troubleshooting.
Our guide will show you precisely what to look for. You’ll learn to identify the rectangular, silver-and-black carb and understand its connection to the fuel line and air filter. Let’s get your equipment back in top shape.
Key Takeaways
- The carburetor is a crucial component that mixes air and fuel for engine operation.
- It is typically found on the side or top of the mower’s engine block.
- You usually need to remove the air filter housing to access it.
- Identifying this part is the first step in troubleshooting many performance issues.
- Knowing its location can empower you to perform maintenance and save on repair costs.
Understanding Your Push Lawn Mower’s Carburetor
Your push mower’s engine relies on a delicate balance to turn fuel into cutting power. This balance is managed by a precise mechanical component.
Role of the Carburetor in Engine Performance
This vital part meters air and fuel in the exact ratio needed for combustion. It constantly adapts the mixture based on engine load and temperature.
When you increase speed or tackle a hill, it allows more fuel to flow. This ensures consistent power delivery for a clean cut across your entire yard.
Why Regular Maintenance Matters
Even tiny particles of dirt or old fuel residue can clog the small passages inside this component. A clog disrupts the critical air-fuel balance.
This leads to poor performance, hard starting, and stalling. Annual cleaning prevents these issues and keeps your machine running reliably.
| Condition | Engine Performance | Fuel Efficiency | Ease of Starting |
|---|---|---|---|
| Well-Maintained | Smooth, consistent power | Optimal fuel use | Starts easily |
| Neglected | Sputtering, loss of power | Increased consumption | Hard starting, stalling |
Where is the Carburetor on a Push Lawn Mower

The search for this essential engine part starts with locating the protective housing that conceals it. Most walk-behind machines position this critical component strategically for optimal performance.
Locating the Component Behind the Air Filter
Your primary landmark is the air filter housing. Look for a square or round plastic cover on the side of your engine. This housing protects the filter element and sits directly in front of the carburetor.
To access the component, remove the filter cover and take out the foam or paper element. You’ll then need to unbolt the housing—typically held by two or three bolts. Once removed, the rectangular metal assembly becomes visible.
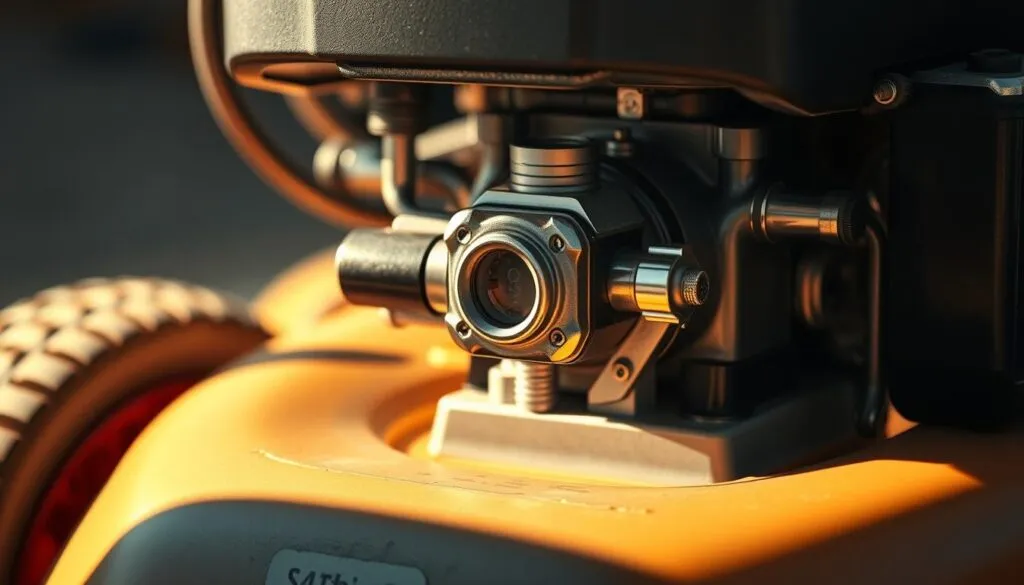
Identify the carburetor by its distinctive silver metallic surfaces with black plastic trim. It connects to the fuel line on one side and the filter housing on the other. Throttle and choke linkage cables attach to its side.
Variations in Design Between Models
Different manufacturers position this part slightly differently. Some place it more toward the top of the engine block. Others mount it squarely on the side. Self-propelled models may have different configurations than basic push mowers.
Consulting your owner’s manual provides model-specific guidance. Understanding these design variations helps you confidently identify your machine’s exact setup. This knowledge prepares you for maintenance tasks covered in later sections.
Step-by-Step Guide to Cleaning and Maintaining Your Carburetor
Keeping your machine’s critical fuel component clean prevents common starting and running problems. Annual maintenance ensures optimal performance throughout the mowing season.
Preparation and Safety Measures
Begin by gathering essential supplies. You’ll need specialized spray cleaner, compressed air, clean rags, and protective gloves. Always work in a well-ventilated area away from ignition sources.
Clean the engine exterior thoroughly before starting. This prevents loose debris from contaminating internal components during disassembly.
Disassembling and Cleaning Procedures
Remove the air filter housing to access the fuel mixing assembly. Document cable positions with photos for easy reassembly. Disconnect throttle linkages carefully.
Apply cleaning spray liberally to all surfaces. Focus on small passages where fuel flows. Use compressed air to blow out loosened deposits.
Allow all parts to air dry completely. Check for rust spots and address them with fine sandpaper if needed.
Proper Reassembly and Testing
Reassemble components in reverse order. Ensure the bowl gasket seats properly and all connections are secure.
Reinstall the filter element and housing. Reconnect fuel lines and throttle cables according to your documentation.
Start the engine and let it run for several minutes. Listen for smooth operation without sputtering or stalling.
Troubleshooting and Repair Tips for Carburetor Issues

When your equipment starts acting up, knowing the signs of carburetor trouble can save you time and frustration. Recognizing these symptoms early helps you address fuel system problems before they cause more serious damage.
Identifying Common Symptoms
Watch for difficulty starting your machine. Multiple pulls on the starter rope often indicate fuel delivery issues. Engine stalling during operation is another red flag.
Other symptoms include black smoke from the muffler and uneven cutting performance. Your equipment may sputter or shake when the air-fuel mixture is incorrect. Increased fuel consumption suggests internal component wear.
When to Repair or Replace Components
Consider replacement rather than repair for most carburetor problems. New units cost around $50 and provide reliable performance. Repair kits at $20 may not solve all issues.
Always check simpler fixes first. A dirty spark plug or clogged air filter can mimic carburetor symptoms. These are easier and cheaper to address.
Take photos before disassembling any parts. This helps with proper reassembly. For complex issues, visit a small engine repair shop for professional service.
With proper maintenance, your original carburetor should last the machine’s lifetime. Address problems promptly to avoid major repairs.
Conclusion
You now possess the knowledge to confidently maintain your machine’s most critical component. Understanding its precise placement and function transforms you from a user into a capable owner.
Regular maintenance is the key to long-lasting engine performance. A simple annual cleaning of this part prevents most common issues. This care ensures your equipment starts easily and runs smoothly all season.
You can choose to handle this task yourself or visit a small engine specialist. Either way, addressing problems quickly saves money and frustration. Your garden will thank you with a consistently beautiful, well-manicured look.
Consult your owner’s manual for model-specific guidance. Proper storage, like draining the fuel tank, also protects your investment. This proactive approach guarantees reliable operation for years.
With this new expertise, you ensure peak performance from your valuable garden equipment. You have taken a major step toward self-sufficient lawn care.
FAQ
How do I find the carburetor on my machine?
Look for this part directly behind the air filter housing on the side of your mower’s engine. It’s a small metal or plastic component usually connected to the fuel line and air intake.
What are the signs my small engine carburetor needs cleaning?
Common symptoms include difficulty starting, rough idling, stalling, black smoke from the exhaust, or a noticeable loss of power during operation. These problems often point to a clogged jet or bowl.
Can I clean the carburetor without removing it from the engine?
Yes, for minor issues, you can often use a specialized aerosol carburetor cleaner. You spray it into the air intake while the engine is running to help dissolve light dirt and varnish. For a thorough cleaning, removal is typically necessary.
What safety steps should I take before starting this repair?
Always disconnect the spark plug wire to prevent accidental starting. Ensure the engine is completely cool. Work in a well-ventilated area and have your owner’s manual handy for specific diagrams related to your model.
When should I consider replacing the carburetor instead of cleaning it?
If cleaning doesn’t resolve performance issues, or if you find visible damage like cracks, severe corrosion, or a warped body, replacement is the better option. Sometimes, a new carburetor is more cost-effective than a complex repair.